If you’re a cyclist, you know how hard it can be to find a good place to store your bike without it getting in the way. That’s where the Home Depot hanging bike rack comes in. This handy storage solution not only saves space but also keeps your bike safe and easily accessible. In this article, we’ll explore all the benefits, tips, and creative uses for a Home Depot hanging bike rack, making sure you get the most out of your purchase.
Key Takeaways
- A Home Depot hanging bike rack saves valuable floor space by utilizing vertical storage.
- These racks offer easy access to your bike, making it convenient to grab and go.
- Protect your bike from damage by keeping it off the ground and out of the way.
- Installation can be straightforward with the right tools and guidance, making it a DIY-friendly project.
- Customer reviews highlight the effectiveness and quality of these racks, making them a popular choice for cyclists.
Discover The Benefits Of A Home Depot Hanging Bike Rack
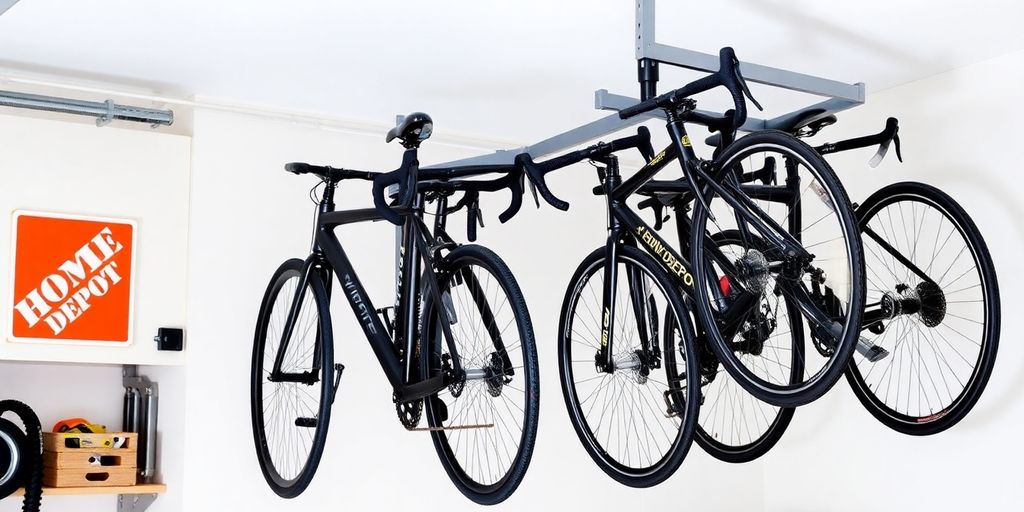
Space-Saving Design
Okay, let’s be real, most of us aren’t living in mansions with endless storage. That’s where a hanging bike rack from Home Depot comes in clutch. These racks are designed to get your bike up off the floor and onto the wall or ceiling, freeing up valuable real estate in your garage, apartment, or shed. Think about it: you could actually park your car in the garage again! Or maybe even start that woodworking hobby you’ve been putting off. It’s all about maximizing what you’ve got.
Easy Access To Your Bike
It’s not just about saving space; it’s about making your life easier. How many times have you tripped over your bike trying to get to the lawnmower? A hanging bike rack puts your bike within easy reach, so you can grab it and go without any hassle. No more wrestling with a tangled mess of bikes and gear. Plus, some racks even swivel, making it even easier to get your bike down. It’s all about convenience, baby! You can find a vertical bike wall hanger that suits your needs.
Protects Your Bike From Damage
Let’s face it, bikes are an investment. You don’t want to just leave it leaning against the wall, where it can get scratched, dented, or even knocked over. A hanging bike rack keeps your bike safe and secure, away from potential hazards. Plus, it helps prevent flat spots on your tires from sitting in the same position for too long. Think of it as giving your bike the VIP treatment it deserves.
A good bike rack is more than just a storage solution; it’s a way to show your bike some love and keep it in top condition for years to come. It’s about respecting your investment and making sure it’s ready to roll whenever you are.
Choosing The Right Home Depot Hanging Bike Rack
So, you’re ready to take the plunge and get a Home Depot hanging bike rack? Awesome! But before you click ‘add to cart,’ let’s make sure you’re getting the perfect one for your needs. There are a few things to consider, and I’m here to walk you through them.
Types Of Bike Racks Available
Home Depot offers a bunch of different bike rack styles, and it’s not always obvious which one is best. You’ve got your basic wall-mounted hooks, which are super simple and affordable. Then there are the more elaborate pulley systems, which can be a lifesaver if you have a heavy bike or limited strength. There are also racks that hold multiple bikes, either horizontally or vertically. Think about how many bikes you need to store and how much effort you want to put into lifting them.
Weight Capacity Considerations
This is a big one! You absolutely need to know the weight of your bike(s) before buying a rack. Check the product description carefully to make sure the rack can handle the load. Don’t forget to factor in any accessories you might leave on the bike, like locks or bags. Overloading a rack is a recipe for disaster, and you don’t want your precious bike crashing to the floor.
Installation Options
Okay, so you’ve picked out a rack, but how are you going to get it on the wall? Some racks are super easy to install with just a few screws, while others require a bit more effort and maybe even some specialized tools. Consider your DIY skills and whether you’re comfortable drilling into studs. If you’re not, it might be worth enlisting a friend or hiring a handyman. Also, think about the type of wall you’ll be mounting the rack on – drywall, concrete, or wood studs all require different approaches.
Choosing the right installation spot is also key. Make sure you have enough clearance around the bike rack to easily get your bike on and off. You don’t want to be bumping into walls or other objects every time you grab your ride. Think about the flow of your garage or storage area and pick a spot that makes sense.
Installation Tips For Your Home Depot Hanging Bike Rack
Tools You’ll Need
Alright, so you’ve got your shiny new bike rack from Home Depot. Awesome! Now, before you start tearing into the packaging, let’s make sure you have all the right tools. Nothing’s worse than getting halfway through a project and realizing you’re missing something. Here’s a quick checklist:
- Stud finder: This is essential for safely mounting to a wall. Don’t skip this step!
- Drill with appropriate drill bits: You’ll need this to make pilot holes for the mounting hardware.
- Screwdriver or drill with screwdriver bits: Make sure you have the right size to match the screws that came with your rack.
- Level: Nobody wants a crooked bike rack. A level will ensure your rack is perfectly straight.
- Measuring tape: For accurate placement and spacing.
- Pencil: For marking your drilling locations.
Having these tools ready will make the installation process smooth and stress-free. Trust me, a little preparation goes a long way!
Step-By-Step Installation Guide
Okay, let’s get this bike rack up on the wall! Follow these steps, and you’ll be storing your bike like a pro in no time. Always refer to the specific instructions that came with your Home Depot bike rack, as models can vary slightly.
- Find the Studs: Use your stud finder to locate the wall studs where you want to mount the rack. Mark the stud locations clearly with your pencil. This is super important for a secure hold.
- Position the Rack: Hold the bike rack against the wall at the desired height and location. Use your level to ensure it’s perfectly level. Mark the locations for the mounting holes on the wall, using the rack as a template.
- Drill Pilot Holes: Using your drill and the appropriate sized drill bit (check your rack’s instructions), drill pilot holes at the marked locations. Make sure the holes are deep enough to accommodate the mounting hardware.
- Attach the Rack: Align the bike rack with the pilot holes and use your screwdriver or drill to attach it to the wall using the provided screws or bolts. Make sure the rack is securely fastened to the studs. Don’t overtighten, or you risk stripping the screws or damaging the wall.
- Test the Rack: Before hanging your bike, give the rack a good tug to make sure it’s securely mounted. If it feels wobbly, double-check that you’ve hit the studs and that the mounting hardware is tight.
Remember, safety first! If you’re not comfortable with any of these steps, it’s always best to consult a professional.
Common Mistakes To Avoid
Installing a bike rack seems simple, but there are a few common pitfalls to watch out for. Here’s what not to do:
- Skipping the Stud Finder: Mounting the rack only to drywall is a recipe for disaster. The rack will likely pull away from the wall, potentially damaging your bike and your wall. Always use a stud finder to locate solid wood framing.
- Ignoring Weight Capacity: Make sure the rack you choose is rated to hold the weight of your bike. Overloading the rack can lead to failure and damage.
- Overtightening Screws: Overtightening can strip the screws or damage the wall, making the rack less secure. Tighten the screws until they are snug, but don’t force them.
- Not Using a Level: A crooked bike rack looks unprofessional and can put uneven stress on the mounting hardware. Use a level to ensure the rack is perfectly straight.
- Forgetting to Read the Instructions: Every bike rack is a little different. Always read the manufacturer’s instructions before starting the installation process. They often contain important information specific to your model. For example, some racks are vertical bike wall hangers and require different spacing.
Maximizing Storage Space With A Home Depot Hanging Bike Rack
Utilizing Vertical Space
Okay, so you’ve got your hanging bike rack from Home Depot. Awesome! Now, let’s talk about actually making the most of it. The biggest win here is using vertical space. Think about it: your bikes are usually just chilling on the floor, taking up valuable real estate. By hoisting them up, you’re freeing up that floor space for, well, anything else! I’ve seen people put tool chests, workbenches, or even just create a clear walkway. It’s all about thinking up instead of out.
Organizing Accessories
It’s not just about the bike, is it? Helmets, gloves, pumps, spare tubes… the list goes on. These things can quickly turn into a chaotic pile. Here’s where some clever organization comes in. Consider adding a small shelf above or below your bike rack. You could also use pegboards or hooks nearby to hang helmets and other gear. Baskets are also your friend! A simple wire basket can hold smaller items and keep everything tidy. The goal is to create a dedicated zone for all your cycling stuff.
Creating A Dedicated Bike Area
Think of your bike rack as the anchor for a whole bike area. It’s not just about sticking the rack on a random wall. Consider the surrounding space. Can you add some lighting to make it easier to work on your bike? Maybe a small mat to protect the floor from tire marks? A dedicated bike area makes it easier to maintain your bike, find your gear, and generally enjoy your cycling hobby. Plus, it looks way more organized than just having a bike leaning against a wall!
Maintaining Your Home Depot Hanging Bike Rack
Okay, so you’ve got your bike rack up and running – awesome! But don’t just forget about it. A little maintenance goes a long way in keeping it safe and functional for years to come. Think of it like your bike; you wouldn’t just leave it out in the rain without a thought, right? Same goes for your rack!
Regular Inspections
Make it a habit to check your bike rack every few months. Look for any signs of wear and tear. Are there any loose bolts? Any cracks in the metal or plastic? Is anything looking rusty? Catching these things early can prevent bigger problems down the road. I usually give mine a quick once-over when I’m already fiddling with my bikes, so it doesn’t feel like extra work. It’s also a good idea to check the wall anchors to make sure they’re still secure. You don’t want your rack (and your bike!) taking an unexpected tumble.
Cleaning Tips
Keeping your rack clean is super simple. Just wipe it down with a damp cloth every now and then. If you live in a particularly dusty or salty environment, you might want to do it more often. For tougher grime, a little soap and water will do the trick. Avoid using harsh chemicals or abrasive cleaners, as these can damage the finish. After cleaning, make sure everything is completely dry to prevent rust.
When To Replace Your Rack
Okay, this is the part nobody wants to think about, but it’s important. Even with the best care, your bike rack won’t last forever. If you notice any of the following, it’s probably time for a replacement:
- Significant rust or corrosion
- Cracks or breaks in the frame
- Loose or damaged mounting hardware that can’t be easily fixed
- The rack is no longer able to securely hold your bike
Basically, if you have any doubts about the safety of your rack, it’s better to be safe than sorry. Replacing it is a small price to pay compared to the potential damage to your bike or, worse, an injury. Plus, you can always upgrade to a newer, fancier model! Consider the Rubbermaid FastTrack System for a robust and adaptable storage solution.
Customer Reviews Of Home Depot Hanging Bike Racks
Real User Experiences
So, what are people actually saying about these Home Depot hanging bike racks? Well, it’s a mixed bag, like with most things. Some folks are absolutely thrilled, raving about how much space they’ve saved and how easy it is to get their bikes up and down. Others… not so much. I’ve seen some complaints about the racks not being sturdy enough for heavier bikes, or the installation being a pain. It really seems to depend on the specific model and, honestly, how handy you are with tools.
Pros And Cons
Okay, let’s break it down into a simple pros and cons list based on what people are saying:
Pros:
- Saves a ton of space, especially in garages or apartments.
- Keeps bikes off the floor and out of the way.
- Relatively easy to install (for some models, at least).
- Can be a pretty affordable storage solution.
Cons:
- Might not be suitable for very heavy bikes.
- Installation can be tricky if you’re not experienced.
- Some racks might feel a bit flimsy.
- You need enough vertical space to make it work.
Top Rated Models
Alright, so if you’re thinking of getting one, which ones should you check out? From what I’ve gathered, the RAXGO Garage Bike Rack seems to be a popular choice, especially if you need to store multiple bikes. People like that it has adjustable hooks, so you can customize the spacing. However, I did see some folks mentioning issues with the screws and anchors, so maybe grab some extra heavy-duty ones just in case.
One thing I’ve noticed is that a lot of the positive reviews mention taking the time to really plan out the installation. Measure everything twice, make sure you’re hitting studs, and don’t rush it. A little extra effort upfront can save you a lot of headaches later on. Plus, it’s always a good idea to read through a bunch of reviews before you buy, so you know what to expect and can avoid common pitfalls.
Creative Ways To Use Your Home Depot Hanging Bike Rack
Multi-Purpose Storage Solutions
Okay, so you’ve got your bike happily hanging on its new rack. But wait, there’s more! These racks aren’t just for bikes. Think outside the box. Got a kayak paddle? Fishing rods? How about those bulky seasonal decorations that always seem to be in the way? A Home Depot hanging bike rack can be surprisingly versatile. It’s all about maximizing that vertical space!
Decorative Ideas
Who says storage can’t be stylish? Your bike rack doesn’t have to be an eyesore. Consider painting it a fun color that complements your decor. Or, if you’re feeling extra crafty, add some decorative hooks to hang plants or artwork alongside your bike. You could even use the rack as a base for a vertical garden! It’s a chance to show off your personality and make your storage solution a focal point.
Incorporating Into Your Home Design
Let’s face it, bikes can be bulky and awkward. But with a little planning, you can seamlessly integrate your bike rack into your home design. Think about the overall aesthetic of your space. Is it modern and minimalist? Or cozy and rustic? Choose a rack that complements your style. Consider these ideas:
- Use the bike rack as a room divider in a studio apartment.
- Install the rack in a mudroom or entryway to create a designated bike zone.
- Incorporate the rack into a gallery wall, displaying your bike as a piece of art.
By thinking creatively about placement and design, you can transform your bike rack from a purely functional item into a stylish and integrated part of your home.
Wrap-Up: Your Bike Deserves the Best
So there you have it! A Home Depot hanging bike rack can really change the game for your space. No more tripping over bikes or struggling to find a place to store them. With a simple installation, you can keep your bikes safe and out of the way, making room for other things you love. Plus, it just looks neat and tidy! Whether you’re a casual rider or a cycling enthusiast, this rack is a smart choice. So go ahead, grab one and enjoy the extra space and organization it brings to your home!
Frequently Asked Questions
What is a Home Depot hanging bike rack?
A Home Depot hanging bike rack is a storage solution that lets you hang your bike on the wall, saving floor space in your garage or home.
How do I install a hanging bike rack?
Installing a hanging bike rack is usually easy. You will need some basic tools like a drill and screws. Most racks come with instructions to help you.
Can I use a hanging bike rack for all types of bikes?
Most hanging bike racks can hold different types of bikes, including mountain bikes and road bikes. Just check the weight limit and size before buying.
Will a hanging bike rack damage my bike?
No, a good hanging bike rack is designed to hold your bike securely without causing any damage. Just make sure you follow the installation instructions.
How much weight can a hanging bike rack hold?
The weight capacity of hanging bike racks varies, but many can hold between 30 to 80 pounds. Check the product details to be sure.
Where should I install my bike rack?
You should install your bike rack in a dry area, like a garage or shed. Make sure it’s at a height that’s easy for you to reach.