Keeping your shed organized can make it a lot easier to find what you need when you need it. This article will guide you on how to choose the best Rubbermaid shed tool rack, maximize your storage space, and maintain a tidy environment. Whether you’re a gardening enthusiast or just need a place for your tools, these tips will help you create a functional and organized shed.
Key Takeaways
- Select the right tool rack based on your storage needs and available space.
- Use vertical storage solutions like shelves and hooks to save floor space.
- Incorporate DIY projects to create custom storage options on a budget.
- Regular cleaning and maintenance keep your shed in good shape and pest-free.
- Personalizing your shed can make it more enjoyable and functional.
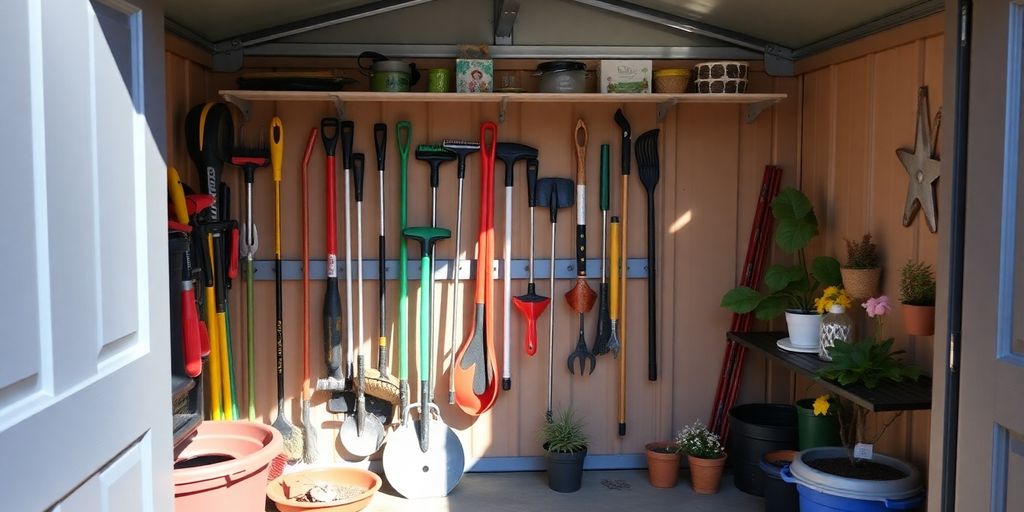
Choosing the Right Rubbermaid Shed Tool Rack
When it comes to organizing your shed, choosing the right tool rack is key. A well-selected rack can make a huge difference in how tidy and functional your space is. Here’s how to get started:
Assessing Your Storage Needs
- Take Inventory: Look at all the tools and items you need to store. Group them by type, like gardening tools, sports gear, or seasonal decorations.
- Measure Your Space: Knowing the dimensions of your shed will help you pick a rack that fits perfectly.
- Consider Accessibility: Think about how often you use each item. Keep frequently used tools within easy reach.
Types of Tool Racks Available
There are several types of tool racks to consider:
- Wall-Mounted Racks: Great for hanging tools like rakes and shovels.
- Shelving Units: Perfect for storing pots, soil bags, and smaller tools.
- Pegboards: Ideal for keeping tools visible and organized.
Material Considerations
Choosing the right material is important. Here’s a quick comparison:
| Material | Pros | Cons |
|---|---|---|
| Wood | Aesthetic, Customizable | Requires maintenance |
| Metal | Durable, Low maintenance | Can rust |
| Plastic | Lightweight, Weather resistant | Less sturdy |
Budget-Friendly Options
You don’t have to spend a lot to get organized. Here are some budget-friendly tips:
- Use Free-Standing Shelves: They are durable and can be moved easily.
- Label Plastic Bins: Store small items in labeled bins for easy access.
- DIY Solutions: Repurpose old furniture or use pallets for custom storage.
Remember, a well-organized shed not only saves you time but also makes your gardening tasks more enjoyable. Happy organizing!
Maximizing Vertical Space in Your Shed
When it comes to organizing your shed, using vertical space is key! By taking advantage of the height of your shed, you can free up valuable floor space and keep everything tidy. Here are some great ways to maximize that vertical space:
Installing Shelves and Pegboards
- Shelves: Adding shelves is a fantastic way to store items like pots, tools, and supplies. You can even use adjustable shelves to fit different sizes of items.
- Pegboards: These are perfect for hanging tools and keeping them visible. You can customize them with hooks and bins to fit your needs.
Using Wall-Mounted Hooks
- Wall-mounted hooks are a simple solution for hanging larger tools like rakes and shovels. They keep your tools off the ground, making your shed look neat and organized.
- You can find hooks that hold multiple tools, saving you even more space!
Creative Use of Shed Doors
- Don’t forget about your shed doors! They can be a great spot for extra storage. Consider adding:
- Hanging organizers for small tools and supplies.
- Magnetic strips to hold metal tools like screwdrivers and pliers.
- Door-mounted shelves for lightweight items like paint cans.
Utilizing wall space for vertical storage solutions can efficiently declutter your garden shed or garage while making all your tools more accessible when necessary.
By implementing these ideas, you can transform your shed into a well-organized space that’s easy to navigate! Remember, a tidy shed not only looks good but also makes finding your tools a breeze.
For even more organization, consider investing in a vertical tool rack to keep your garden tools neat and tidy. With options that include multiple tiers and hooks, you can find a rack that fits your needs perfectly!
Organizing Small Tools and Accessories
Using Magnetic Strips
Magnetic strips are a fantastic way to keep small metal tools organized. You can attach a magnetic strip to the inside of your shed door to hold items like screwdrivers, wrenches, and pliers. This not only keeps your tools visible but also makes them easily accessible.
Incorporating Bins and Baskets
Bins and baskets are perfect for organizing smaller items like seeds, gloves, and hand tools. Here are some tips for using them effectively:
- Label each bin for easy identification.
- Use clear bins to see contents at a glance.
- Stack bins to save space on shelves.
Labeling and Sorting Items
Keeping your tools sorted is key to a tidy shed. Here’s how to do it:
- Group similar items together, like gardening tools or hardware.
- Use labels to mark where everything belongs.
- Regularly check and reorganize as needed.
Remember, a well-organized shed not only saves you time but also prolongs the life of your tools. Get creative and make the most of what you already have!
Maintaining Your Rubbermaid Shed Tool Rack
Keeping your Rubbermaid shed tool rack in great shape is key to having an organized space. Here are some tips to help you maintain it:
Regular Cleaning and Upkeep
- Dust and wipe down surfaces regularly to prevent dirt buildup.
- Check for any signs of wear and tear, like rust or cracks, and address them promptly.
- Organize tools back into their designated spots after each use to keep everything in order.
Pest Control Measures
- Pests can cause significant damage to your shed. Conduct periodic checks for termites, ants, rodents, and other pests.
- Seal any cracks or gaps where pests might enter. Using pest repellents or traps can also help keep these unwanted guests at bay.
- Consider using natural repellents like peppermint oil to deter pests without harmful chemicals.
Repairing Common Issues
- If you notice any loose screws or parts, tighten them to ensure stability.
- For any cracks or breaks, use a strong adhesive or replacement parts to fix them.
- Regularly inspect the tool rack for any signs of damage and address them quickly to avoid bigger problems later.
Remember, a well-maintained tool rack not only keeps your tools safe but also makes your shed a more enjoyable place to work. Taking a little time for upkeep can save you a lot of hassle down the road!
DIY Projects for Custom Storage Solutions
Repurposing Household Items
Why buy new when you can repurpose? Look around your home for items that can be transformed into storage solutions. Here are some ideas:
- Old bookshelves can store small toolboxes.
- Wooden crates from grocery stores can be stacked for rustic storage.
- Mason jars can keep nails and screws organized. Get creative with what you have!
Simple DIY Projects
Creating your own garden tool organizer doesn’t have to be complicated. Here are a few easy projects:
- Start with a basic wooden pallet and turn it into a garden tool holder.
- Use leftover PVC piping to make a tool hanger for long-handled items like rakes and shovels.
- Install magnetic strips on the walls to hold metal tools like pliers and trowels.
Budget-Friendly Tips
Organizing your shed doesn’t have to break the bank. Here are some budget-friendly tips:
- Use free-standing metal shelving: These are durable and can be moved around easily.
- Label plastic tubs: Store hardware, cords, and other small items in labeled plastic tubs for easy access.
- Install utility hooks: Hang items like tailgate chairs and sporting equipment to keep them off the floor.
A well-organized shed not only saves you time but also prolongs the life of your tools. Get creative and make the most of what you already have!
Optimizing Floor Space with Rolling Carts
Benefits of Rolling Carts
Rolling carts are a fantastic way to make the most of your shed’s floor space. They can be easily moved around, allowing you to store items you need to access frequently, like gardening supplies or small tools. When you’re done, simply roll the cart out of the way. This flexibility helps keep your shed organized and makes cleaning a breeze.
Choosing the Right Cart
When selecting a rolling cart, consider the following:
- Size: Make sure it fits in your shed without taking up too much space.
- Material: Look for sturdy materials that can hold your tools and supplies.
- Wheels: Ensure the wheels are durable and can roll smoothly on your shed floor.
Organizing with Zones
To keep your shed tidy, create zones for different items on your rolling cart. Here are some ideas:
- Gardening Tools: Store shovels, rakes, and gloves together.
- Small Supplies: Use bins for screws, nails, and other small items.
- Cleaning Supplies: Keep brooms, mops, and cleaning solutions in one area.
Remember, the key to a well-organized shed is to make use of every inch of space. By using rolling carts, you can keep your shed tidy and functional. Utilizing rolling carts can boost your shed’s efficiency and productivity.
Personalizing Your Shed for Functionality and Style
Creating a shed that reflects your personality can be a fun project! Personalizing your shed not only makes it look great but also enhances its functionality. Here are some ideas to get you started:
Custom Paint and Decor
- Choose colors that match your home or garden.
- Add decorative touches like wall art or themed decor.
- Use weather-resistant materials to ensure durability.
Adding Lighting Solutions
- Install LED lights for energy efficiency.
- Use string lights for a cozy atmosphere.
- Consider motion-sensor lights for convenience.
Creating a Functional Workbench Area
- Build a sturdy workbench for projects.
- Organize tools with pegboards or shelves above the bench.
- Keep frequently used items within easy reach.
Remember, a well-designed shed can be both functional and stylish. Embrace your creativity and make your shed a space you love to spend time in!
By following these tips, you can create a shed that is not only practical but also a reflection of your unique style. Design ideas for your shed can truly transform it into a personal retreat!
Wrap-Up: Your Organized Shed Awaits!
In conclusion, organizing your shed with the Rubbermaid tool rack can really change the game. By using smart storage solutions, you can turn a messy space into a neat and functional area. Remember, it’s all about making the most of your space! With a little creativity and the right tools, you’ll find everything you need right at your fingertips. So, get started today and enjoy a clutter-free shed that makes your outdoor tasks a breeze!
Frequently Asked Questions
What is a Rubbermaid shed tool rack?
A Rubbermaid shed tool rack is a storage solution designed to help you organize tools and equipment in your shed.
How do I choose the right tool rack for my shed?
Consider your storage needs, the types of tools you have, and the space available in your shed.
Can I install a tool rack myself?
Yes, most Rubbermaid tool racks are designed for easy installation and usually come with instructions.
What materials are Rubbermaid tool racks made from?
They are often made from durable plastic or metal, which helps them last longer.
Are there budget-friendly options for tool racks?
Yes, Rubbermaid offers various options at different price points to fit your budget.
How do I maintain my tool rack?
Regularly clean it and check for any damage to ensure it stays in good condition.