Is your garage or shed a mess? Are you tripping over rakes and shovels every time you try to find something? Well, you’re not alone. Lots of people struggle with keeping their outdoor tools neat and tidy. But what if I told you there’s a simple way to get everything organized and free up some floor space? It’s all about using your walls. We’re going to talk about smart yard tool wall storage solutions that can turn your messy space into a super functional area.
Key Takeaways
- Using wall space can really help clear up floor clutter in your garage or shed.
- There are different wall storage systems, like pegboards and slatwalls, that you can pick from based on what you need.
- You can save money and get custom storage by doing some DIY projects, like building your own racks.
- Grouping similar tools and labeling them makes it way easier to find what you’re looking for.
- Keeping your storage neat means doing a little bit of maintenance regularly, like putting things back where they belong.
Unlock Your Walls’ Potential
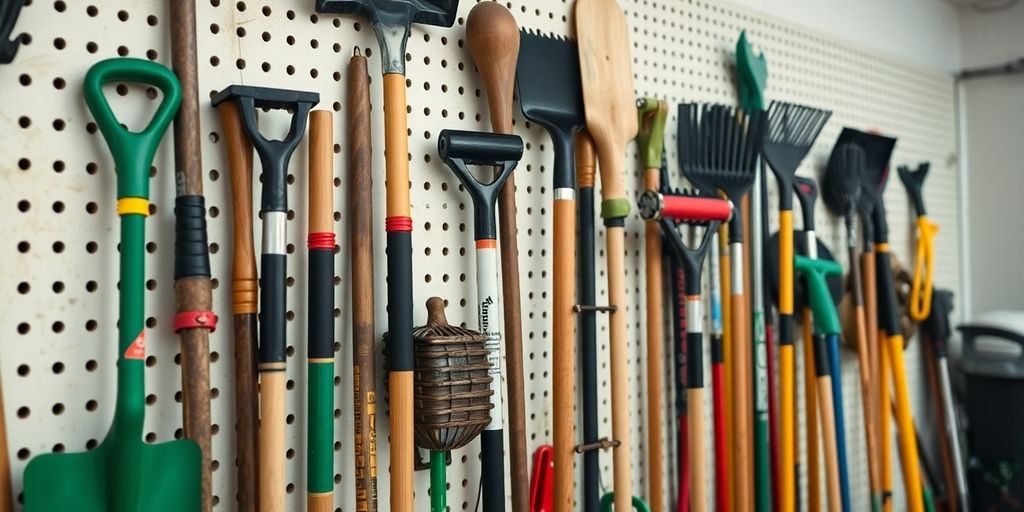
Okay, let’s talk about walls. Seriously! We often overlook them, but they’re basically untapped real estate in your garage or shed. Think of all that wasted space just sitting there, begging to hold your shovels, rakes, and that weirdly specific weeding tool you bought on a whim. It’s time to change that. Let’s get those tools off the floor and onto the walls where they belong!
Vertical Storage for Every Tool
Vertical storage is a game-changer. Instead of sprawling your tools across the floor, you’re going up, maximizing every inch. This isn’t just about tidiness; it’s about efficiency. Imagine being able to see all your tools at a glance, grab what you need, and get to work without tripping over a rogue hoe. Plus, it makes your space look way more organized, which is always a win.
- Use hooks for hanging tools like shovels and rakes.
- Install racks for holding smaller items like hand trowels and pruning shears.
- Consider magnetic strips for metal tools like screwdrivers and pliers.
Maximizing Overhead Space
Don’t forget about the space above your head! Overhead storage is perfect for those items you don’t use every day. Think seasonal tools, like snow shovels in the summer or leaf blowers in the winter. Ceiling-mounted racks or shelves can keep these items out of the way but still accessible when you need them. Just make sure whatever you install is sturdy enough to handle the weight.
Think about it: that space is just air! Why not turn it into a storage goldmine? Just be sure to measure carefully and use appropriate hardware to avoid any unfortunate tool avalanches.
Smart Solutions for Awkward Items
We all have those tools that just don’t fit neatly anywhere. Maybe it’s a bulky wheelbarrow, a long ladder, or a collection of oddly shaped planters. The key is to get creative. For wheelbarrows, consider a wall-mounted hook system that allows you to hang it vertically. For ladders, ceiling-mounted solutions are your best bet. And for those planters? Stackable shelves or custom-built racks can work wonders.
Choosing the Right Wall Storage System
Okay, so you’re ready to ditch the leaning tower of tools and embrace the beauty of wall storage. Awesome! But before you start drilling holes, let’s talk about picking the right system. It’s not one-size-fits-all, and you want something that’ll actually work for you, not just look good in a catalog. Think about what you’re storing, how often you need it, and how much space you’re working with. Let’s explore some popular options.
Pegboards: Your Customizable Canvas
Pegboards are like the OGs of wall storage, and for good reason. They’re super versatile and relatively cheap. You can arrange hanging accessories like hooks and brackets however you want, making them perfect for adapting to your ever-changing tool collection. I’ve used them for everything from screwdrivers to spray paint cans. The key is getting a sturdy pegboard and good quality hooks that won’t bend or fall out when you grab a tool. Plus, you can paint them to match your garage or shed – bonus points for style!
Slatwall Systems for Ultimate Flexibility
Slatwall systems are the fancier cousin of pegboards. Instead of holes, they have horizontal grooves where you attach accessories. This makes them incredibly easy to rearrange – no more struggling to get those little pegs in and out! They’re great if you like to switch things up often or if you anticipate your storage needs changing. Slatwall can be a bit pricier, but the flexibility and clean look might be worth it. Plus, they look super professional, almost like a store display. You can even find LINEA accessories to make it look even better!
Heavy-Duty Racks for Big Tools
Got a bunch of shovels, rakes, and other long-handled tools? You’ll need something more robust than a pegboard hook. Heavy-duty racks are designed to hold the weight and awkward shapes of these items. Look for racks with rubberized grips to prevent tools from slipping and scratching. I’ve found that spacing them out properly is key – you don’t want to be wrestling with a tangled mess every time you need a rake. Consider a rack with adjustable heights to fit your needs.
Choosing the right wall storage system really depends on your specific needs and the types of tools you have. Don’t be afraid to mix and match different systems to create a solution that works best for you. Think about the weight capacity, adjustability, and overall durability of each option before making a decision. After all, you want something that will last for years to come.
DIY Wall Storage Projects
Building a Long-Handled Tool Rack
Alright, let’s get our hands dirty! Building a long-handled tool rack is way easier than it sounds, and it’s super satisfying to see all those rakes and shovels finally off the floor. You can totally customize this to fit your space and the number of tools you’ve got.
Here’s a basic rundown:
- Measure your space: Figure out how long you want your rack to be and where you’re going to mount it.
- Cut your wood: You’ll need a backboard and some smaller pieces for the tool holders. 2x4s work great for the backboard, and you can use smaller pieces for the holders.
- Drill holes: Drill holes in the smaller pieces that will hold the tools. Make sure they’re big enough for the tool handles to slide through easily.
- Assemble: Screw the smaller pieces onto the backboard, spacing them out according to the size of your tools.
- Mount: Use heavy-duty screws to attach the rack to the wall studs. Make sure it’s level!
I built one of these last summer, and it took me maybe an afternoon. The best part? No more tripping over the garden tools! Plus, it’s a great way to use up scrap wood you might have lying around.
Crafting Custom Shelving Units
Shelving units are a game-changer for organizing smaller items like gloves, plant food, or even spare parts for your lawnmower. And the best part is, you can build them exactly how you want them.
Consider these options:
- Floating shelves: These look super sleek and are great for lighter items.
- Corner shelves: Perfect for maximizing space in those awkward corners.
- Adjustable shelves: Give you the flexibility to change the height as needed.
The key is to plan it out beforehand. Think about what you’ll be storing and how much weight the shelves need to hold. Plywood is a good choice for shelves because it’s strong and relatively inexpensive. Don’t forget to sand and paint or stain the wood to give it a finished look!
Repurposing Materials for Storage
This is where you can really get creative! Look around your house and see what you can repurpose into yard tool storage. Old pallets, for example, can be transformed into a cool tool rack with minimal effort. Just sand them down, add some hooks, and you’re good to go. Old metal buckets can become holders for small hand tools, and even old tires can be stacked to create a unique storage system. The possibilities are endless!
Here are some ideas to get you started:
- Old Ladders: Lean an old ladder against the wall and use the rungs to hang tools.
- PVC Pipes: Cut PVC pipes into different lengths and mount them on a board to hold tools vertically.
- Mason Jars: Screw mason jar lids to the underside of a shelf to store small items like screws and nails.
Don’t be afraid to experiment and see what works for you. Repurposing materials is not only a great way to save money, but it’s also good for the environment. Plus, you’ll end up with a one-of-a-kind storage solution that reflects your personal style.
Organizing Your Yard Tools Like a Pro
Okay, so you’ve got your awesome wall storage set up. Now what? Just throwing tools up there isn’t organizing. Let’s get real about making this system work for you, not against you. It’s all about creating a space where you can actually find what you need, when you need it, without turning your storage area into a chaotic mess. Trust me, a little bit of effort here goes a long way.
Grouping Similar Tools Together
Think about how you actually use your tools. Do you grab the rake and the leaf blower at the same time? Then keep them together! It sounds simple, but grouping similar tools makes a huge difference. Shovels with shovels, rakes with rakes, pruning shears with other trimming tools. You get the idea. This way, when you’re heading out to tackle a specific task, you can grab everything you need in one go. Plus, it just looks nicer, right? Consider using backyard storage solutions to keep everything tidy.
Labeling for Easy Access
Seriously, don’t skip this step. I know, it sounds tedious, but labeling is a game-changer. Grab a label maker (or even just some masking tape and a marker) and label everything. Shelves, bins, hooks – everything. This is especially helpful if you’re using bins or containers where you can’t see what’s inside. Trust me, future you will thank you when you’re not rummaging through five different bins trying to find your gardening gloves.
Keeping Frequently Used Items Handy
This is key. Think about the tools you use all the time. Your favorite trowel, your go-to pruners, the hose nozzle you can’t live without. These should be front and center, easy to grab without having to move anything else. Put them on the most accessible hooks or shelves. Less frequently used items can go higher up or further back. It’s all about making your life easier, one tool at a time.
Think of your wall storage like a well-organized kitchen. You wouldn’t put your everyday dishes in the back of a cabinet, would you? Same principle applies here. Keep what you use most often within easy reach, and store the rest out of the way. It’s about efficiency and making your yard work less of a chore.
Beyond the Basics: Advanced Wall Storage Ideas
Okay, so you’ve got the basics down. Pegboards are hung, slatwalls are installed, and your shovels aren’t tripping hazards anymore. But let’s be real, there’s always room for improvement, right? Let’s explore some next-level ideas to really maximize your wall storage and make your neighbors jealous.
Sliding Shelves for Hidden Gems
Think secret compartments, but for your garden tools! Sliding shelves are awesome because they let you pack a ton of stuff into a smaller space, and you can hide away those less-used items. Imagine a shelf that slides out to reveal your pruning shears and grafting tools. It’s all about maximizing every inch, and keeping things tidy. Plus, it feels pretty cool to have a hidden storage area, doesn’t it?
Ceiling-Mounted Solutions for Ladders
Ladders. They’re essential, but also super awkward to store. Leaning them against a wall is a recipe for disaster, and they take up valuable floor space. Ceiling-mounted racks are the answer! You can hoist your ladder up and out of the way, freeing up a ton of space. Just make sure you install them securely into the joists – safety first!
Integrating Bins and Hooks
Don’t underestimate the power of a good bin or hook! Think about adding clear bins to your wall storage system for things like gloves, small tools, or even seed packets. Hooks are perfect for hanging anything with a handle – think trowels, hand rakes, and even watering cans. The key is to mix and match to create a system that works for your specific needs.
Wall storage isn’t just about getting things off the floor; it’s about creating a system that makes your life easier. By thinking outside the box and incorporating some advanced ideas, you can transform your garage or shed into an organized paradise. So, get creative, have fun, and enjoy your newly organized space!
Maintaining Your Organized Space
Okay, so you’ve put in the work and created an awesome wall storage system for your yard tools. Congrats! But the job’s not quite done. Keeping it that way takes a little effort, but trust me, it’s worth it. Think of it like this: a little maintenance now saves you from a huge headache later. Plus, who doesn’t love a tidy space?
Regular Decluttering Habits
Alright, let’s be real. Stuff accumulates. It’s like a law of nature. That’s why regular decluttering is key. I try to do a quick sweep every month or so.
Here’s my approach:
- Get rid of broken stuff: If it’s beyond repair, toss it. No point in holding onto something that’s just taking up space.
- Donate or sell: Tools you don’t use anymore? Someone else might need them. Local charities or online marketplaces are your friends.
- Re-evaluate: Did you buy something thinking you’d use it all the time, but it’s just been gathering dust? Time to let it go.
Seasonal Storage Swaps
Think about it: you’re not using your snow shovel in July, right? And your lawn mower probably gets a break in December. That’s where seasonal swaps come in. It’s all about keeping what you need handy and tucking away what you don’t.
Here’s how I handle it:
- Summer: Lawn mower, gardening tools, hoses front and center.
- Winter: Snow shovel, ice scraper, snow blower easily accessible.
- Off-season: Store the unused tools higher up or in less convenient spots. This keeps the frequently used items within easy reach.
Quick Tips for Ongoing Tidiness
Okay, here are some super simple things you can do to keep your wall storage in tip-top shape. These are the little habits that make a big difference over time. Think of them as the secret sauce to a perpetually organized space.
- Put tools back after each use: Seriously, this is the biggest one. It takes like, 10 seconds, and it prevents clutter from building up. I try to make it a habit to store tools immediately after I’m done with them.
- Wipe down tools before storing: A quick wipe with a cloth gets rid of dirt and grime, which helps prevent rust and keeps your tools in good condition. Plus, it keeps your storage area cleaner.
- Check for wear and tear: While you’re putting tools away, give them a quick once-over. Look for loose screws, cracks, or anything that needs fixing. Catching these things early can save you from bigger problems down the road.
Maintaining your organized space isn’t about perfection; it’s about creating a system that works for you and sticking with it. A little bit of effort on a regular basis will keep your yard tool wall storage looking great and functioning perfectly for years to come. And that’s something to feel good about!
Wrapping Things Up
So, there you have it! Getting your yard tools organized on the wall really makes a difference. It’s not just about making your garage or shed look neat, though that’s a nice bonus. It’s about making your life a little easier, saving you time when you’re looking for that rake or shovel. Plus, keeping tools off the floor helps them last longer and keeps your space safer. With all the cool options out there, from simple hooks to fancy systems, finding something that works for your space and budget is totally doable. So go ahead, get those tools up and out of the way. You’ll be glad you did!
Frequently Asked Questions
What’s the best wall storage system for my yard tools?
Picking the best wall storage for your yard tools depends on what you need. If you like to change things often, pegboards are great because you can move hooks and shelves around easily. Slatwall systems are also very flexible and look nice. For really heavy tools, strong metal racks are your best bet. Think about how much stuff you have, how heavy it is, and if you want to be able to change your setup later.
Can I build my own wall storage for yard tools?
Absolutely! Making your own storage can save you money and let you build something that fits your space perfectly. Simple projects like a rack for long-handled tools or custom shelves are pretty easy to do. You can even use old materials to create unique storage solutions.
What’s the best way to organize my yard tools on the wall?
To keep your tools neat, try to put similar tools together. For example, all your rakes and shovels can go in one spot. Labeling shelves or hooks helps you find things fast and put them back in the right place. Also, keep the tools you use all the time in a spot that’s easy to reach, so you don’t have to search for them.
How can I use the space near the ceiling for tool storage?
Yes, you can use the space near the ceiling for storage! This area is perfect for things you don’t use very often, like seasonal decorations or camping gear. You can put up deep shelves or closed cabinets high up to keep these items out of the way but still available when you need them.
How do I keep my wall storage organized over time?
Keeping your organized space tidy means doing a little bit of work regularly. Don’t let clutter build up. Also, think about swapping out tools based on the season. For example, in winter, store your lawnmower tools and bring out snow shovels. A quick tidy-up now and then will keep everything looking good.
Are there any clever, advanced wall storage ideas?
Yes, there are some cool, advanced ideas! Sliding shelves can hide things you don’t want to see all the time, but still make them easy to get to. You can hang ladders from the ceiling to save wall space. And mixing different types of storage, like bins for small items and hooks for larger ones, can make your wall storage even more useful.