Is your garage a disaster zone? Mine used to be, a total mess with stuff piled everywhere. Honestly, I could barely walk through it, let alone park a car in there. But then I decided enough was enough. I wanted to build some cool, floating shelves to get everything off the floor and make the place actually usable. It seemed like a big job at first, but it turned out to be pretty straightforward. These diy garage shelves floating are a game-changer, and I’m going to show you exactly how I did it, step-by-step. No fancy tools or crazy skills needed, just a bit of effort and a plan.
Key Takeaways
- Floating shelves save floor space and make your garage look way cleaner.
- Planning is super important; sketch out your design and measure everything before you start buying wood.
- You can build strong, lasting shelves without needing complicated tools like pocket hole jigs.
- Finding wall studs is a must for safely mounting your shelves; don’t skip this part.
- Adding vertical supports to your diy garage shelves floating will make them extra sturdy and able to hold a lot of weight.
Dreaming Up Your DIY Garage Shelves Floating Like a Pro
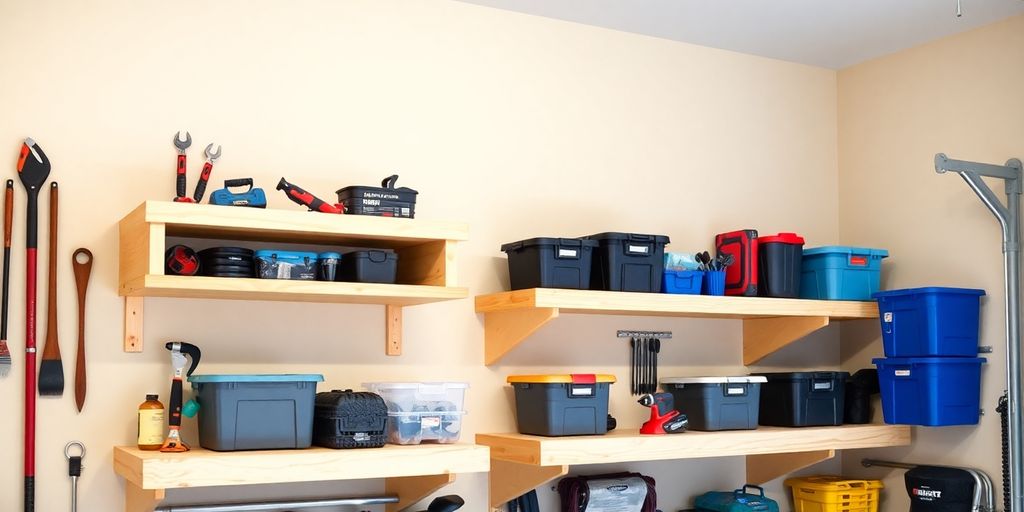
Ready to ditch the garage clutter and embrace a clean, organized space? Building your own floating shelves is a fantastic way to maximize storage without sacrificing floor space. Let’s dive into the planning phase and get those creative juices flowing!
Why Floating Shelves Are a Game Changer
Floating shelves aren’t just about storage; they’re about style and efficiency. They give your garage a clean, modern look while keeping everything you need within easy reach. Plus, no legs mean no obstacles when you’re trying to sweep or roll equipment around. It’s a win-win!
Here’s why I think they’re great:
- Maximize floor space: Get everything off the ground!
- Modern aesthetic: Clean lines for a contemporary garage.
- Easy to clean: No legs to get in the way of sweeping.
Sketching Out Your Storage Masterpiece
Before you even think about picking up a saw, grab a pencil and paper. Start sketching out your dream garage shelves. Consider what you need to store – heavy tools, bulky bins, or smaller items? Think about the length, depth, and height of your shelves. Don’t be afraid to get creative and customize the design to fit your specific needs. I find it helpful to look at other DIY garage shelf projects for inspiration.
Measuring Up for Success
Accuracy is key! Once you have a basic design, it’s time to measure your garage walls. Determine the available space and mark the stud locations. This will be crucial for securely mounting your shelves. Consider the weight each shelf will need to hold and adjust your measurements accordingly. Remember, a little extra support never hurts! Proper measurements will save you headaches down the road.
Gathering Your Awesome Arsenal of Supplies
Alright, let’s get down to brass tacks. Before you even think about picking up a saw, you gotta make sure you’ve got all your gear lined up. Trust me, nothing’s worse than getting halfway through a project and realizing you’re missing a crucial screw or the right kind of wood. It’s like trying to bake a cake and realizing you’re out of sugar – total buzzkill. So, let’s make a list and check it twice, just like Santa, to ensure we’re ready to rock these DIY garage shelves floating.
Essential Tools for the Job
Okay, tools. You don’t need to go crazy and buy every gadget under the sun, but there are a few essentials you absolutely can’t do without. Think of these as your trusty sidekicks in this shelving adventure. Having the right tools not only makes the job easier but also safer, and nobody wants a trip to the emergency room because they tried to cut a board with a butter knife.
Here’s a quick rundown:
- Drill/Driver: This is your bread and butter. You’ll need it for screwing things together (duh!) and pre-drilling holes to prevent the wood from splitting. A cordless one is super convenient.
- Stud Finder: Absolutely crucial for finding those studs in your garage wall. You can’t just screw into drywall and expect your shelves to hold anything. Trust me, I’ve learned this the hard way. A good stud finder will save you a lot of headaches. You can also use it to find shelf hardware.
- Level: Unless you want your shelves to look like they’re trying to escape, a level is a must. Nobody wants books sliding off or things looking wonky. A 4-foot level is a good all-around size.
- Tape Measure: You can’t build anything without measuring, so a good tape measure is essential. Get one that’s at least 25 feet long, and make sure it has a locking mechanism.
- Saw: A circular saw or miter saw will make cutting your wood much easier and more accurate. If you’re only making a few cuts, a handsaw will work, but it’ll take longer and require more elbow grease.
Picking the Perfect Wood for Your diy garage shelves floating
Now, let’s talk wood. The type of wood you choose will depend on your budget, the look you’re going for, and how much weight you need the shelves to hold. Plywood is a popular choice because it’s strong, relatively inexpensive, and comes in large sheets, which means fewer cuts. But there are other options too!
Here’s a quick look at some common choices:
- Plywood: As mentioned, plywood is a great all-around choice. It’s strong, stable, and available in different thicknesses and grades. For garage shelves, I’d recommend at least 3/4-inch plywood.
- Pine: Pine is another affordable option, but it’s not as strong as plywood. It’s a good choice if you’re not planning on storing anything too heavy.
- Hardwood: If you want something really durable and beautiful, hardwood is the way to go. Oak, maple, and cherry are all great choices, but they’re also more expensive.
- OSB (Oriented Strand Board): This is the cheapest option, but it’s not as strong or attractive as plywood or pine. It’s okay for garage shelves if you’re on a tight budget, but I’d recommend using plywood if you can afford it.
All the Screws You’ll Ever Need
Last but not least, let’s talk screws. You might think screws are all the same, but there are actually different types for different purposes. Using the wrong screws can lead to shelves that are wobbly or that fall apart altogether. So, let’s make sure we’ve got the right ones for the job.
Here’s what you’ll need:
- Wood Screws: These are the standard screws for woodworking. Get a variety of sizes, from 1 1/4-inch to 3-inch, depending on the thickness of the wood you’re using.
- Drywall Screws: Don’t use these for building the shelves themselves, but you’ll need them for attaching the shelves to the wall studs. Make sure they’re long enough to go through the drywall and into the stud at least 1 1/2 inches.
- Lag Screws: For extra strength, you can use lag screws to attach the shelves to the wall studs. These are bigger and stronger than drywall screws, but they require pre-drilling a pilot hole.
Remember, it’s always better to have too many screws than not enough. There’s nothing more annoying than running out of screws in the middle of a project and having to make a trip to the hardware store. So, stock up!
Building the Bones of Your Floating Shelves
Making All Your Cuts Count
Alright, let’s get down to business! This is where your measuring skills really shine. Before you even think about firing up that saw, double, triple, quadruple-check your measurements. Seriously, it’s way easier to adjust a number on paper than to fix a wonky cut. Remember that saying, "Measure twice, cut once"? Yeah, live by that.
- Make sure your cuts are straight. A circular saw with a guide is your best friend here.
- Label each piece as you cut it. Trust me, you’ll thank yourself later.
- Take your time. Rushing leads to mistakes, and mistakes lead to wasted wood (and frustration!).
Assembling the Shelf Frames with Ease
Now for the fun part – putting those pieces together! Think of this as building a super-strong skeleton for your shelves. We’re aiming for a frame that can handle some serious weight, so don’t skimp on the screws or the glue.
- Use wood glue in addition to screws for extra strength. It makes a huge difference.
- Pre-drill your screw holes to prevent the wood from splitting. This is especially important if you’re using hardwood.
- Make sure everything is square before you drive in the screws. A square will be your best friend.
Building the frame is like laying the foundation of a house. If it’s not solid, everything else will be shaky. So, take your time, be precise, and build a frame that you can be proud of.
No Pocket Holes, No Problem
Don’t have a pocket hole jig? No sweat! There are plenty of ways to assemble your shelf frames without one. You can use regular screws, just make sure to pre-drill those holes. Another option is to use L-brackets for extra support. These little guys are super handy and can really beef up the strength of your corners. If you are using screws, consider using deck screws for a stronger hold.
- L-brackets are your friend. They add a ton of strength to the corners.
- Countersink your screws so they don’t stick out. This will give you a nice, smooth surface.
- Don’t be afraid to experiment. There’s no one right way to do this, so find what works best for you.
Mounting Your Masterpiece to the Wall
Finding Those Studs Like a Pro
Okay, so you’ve built the shelf frames, and they look awesome. Now comes the slightly nerve-wracking part: attaching them to the wall. But don’t sweat it! The key here is finding those studs. Studs are the vertical wooden beams inside your wall, and they’re what you need to screw into to ensure your shelves can hold some weight.
Here’s how to find them:
- Stud Finder: A stud finder is your best friend here. Run it along the wall, and it’ll beep or light up when it detects a stud. Most stud finders have an electronic sensor, but magnetic ones also work.
- Knocking: If you don’t have a stud finder, try knocking on the wall. A solid sound usually indicates a stud, while a hollow sound means you’re between studs. This method isn’t foolproof, but it can give you a general idea.
- Electrical Outlets: Outlets are usually attached to studs, so they can be a good reference point. However, don’t rely solely on this, as the wiring can be complex.
Once you’ve located a stud, mark it clearly with a pencil. It’s a good idea to double-check your measurements to be sure. Remember, accuracy is key to a sturdy shelf!
Securing the Top Shelf with Confidence
The top shelf is the foundation for the rest, so getting it right is super important. I like to start by marking the desired height of the top shelf on the wall. Use a level to draw a horizontal line across the wall at this height. This ensures your shelf will be straight and level. Now, line up the top of your shelf frame with the line you drew. Using those stud marks you made earlier, pre-drill pilot holes through the back of the shelf frame and into the studs. This prevents the wood from splitting and makes screwing easier.
Now, grab your screws. I recommend using at least 3-inch screws for this, maybe even longer if you plan on storing heavy items. Drive the screws through the pilot holes and into the studs. Make sure the shelf frame is flush against the wall as you screw it in. Use a level to double-check that the shelf is perfectly level before tightening the screws completely. This step is crucial, so take your time and get it right.
Adding More Layers of Storage Awesomeness
With the top shelf securely in place, you can now add the remaining shelves. Measure and mark the desired height for each shelf, making sure they’re evenly spaced. A good tip is to use the top shelf as a reference point. Use a long level to ensure the shelf frames are perfectly level as you screw them into studs. For extra support, consider screwing the frames into wall studs from the short side of the frame. This will help distribute the weight and prevent the shelves from sagging over time.
Remember to use those stud finders to locate the studs for each shelf. If you can’t hit a stud, use heavy-duty wall anchors. These anchors are designed to hold a significant amount of weight, but they’re not as strong as screwing directly into a stud. Distribute the weight evenly across the shelves to maximize their load-bearing capacity.
Once all the shelves are mounted, give them a good shake to make sure they’re secure. If anything feels wobbly, add more screws or anchors as needed. Now you’re one step closer to having awesome floating shelves in your garage!
Finishing Touches for Your diy garage shelves floating
Installing the Shelf Tops
Alright, you’ve got the frames up, looking solid! Now it’s time to give those shelves a surface. I used plywood for my shelf tops, but you could also use particle board if you’re trying to save a few bucks. Cut the tops to size – remember to measure twice, cut once! – and then secure them to the frames with 1 1/4" wood screws. I like to pre-drill the holes to avoid splitting the wood, but that’s just me being extra careful. Make sure the tops are flush with the frames for a clean, professional look.
Adding Vertical Support for Extra Strength
Okay, so you could skip this step, but I wouldn’t recommend it, especially if you plan on storing heavy stuff on your shelves. Adding vertical support legs to the front of the shelves is super easy and adds a ton of extra strength. I used 2x4s for this. Just cut them to the height of your shelves and screw them into the front frame. Make sure the frames are level before you screw in the supports! This will prevent any weird wobbling later on. For added security, consider using construction adhesive in addition to screws. This is especially useful if you’re using plywood for your shelves.
Admiring Your Handiwork
And that’s it! You’re done! Step back, take a look at your new floating garage shelves, and give yourself a pat on the back. You built these bad boys! Now, get ready to load them up and finally get your garage organized. I know I was tired of seeing everything on the floor.
Seriously, though, take a moment to appreciate what you’ve accomplished. You’ve not only added storage space but also increased the value of your home. Plus, you’ve gained some serious DIY bragging rights. Enjoy it!
Here’s a quick recap of the materials I used:
- 2x4s
- Plywood or particle board for tops
- 1 1/4" wood screws
- 3" deck screws
And here’s a reminder of the tools that made this project possible:
- Miter saw
- Drill/Impact driver
- Level
Unleashing the Power of Your New Storage
Organizing Your Garage Like Never Before
Alright, you’ve built these awesome floating shelves, now what? Time to get organized! Think about zones. Maybe one shelf is for automotive stuff – oils, cleaners, and tools. Another could be for gardening supplies. Use clear bins so you can see what’s inside without having to rummage through everything. Labeling is your friend here; a simple label maker can be a total game-changer. Consider the weight distribution on your shelves; heavier items should be closer to the wall.
Enjoying Your Clutter-Free Space
Okay, let’s be real, a clean garage is a beautiful thing. You can actually walk around without tripping over stuff! You might even have room to, you know, park your car in there. Take a moment to appreciate the space you’ve created. It’s not just about storage; it’s about making your life a little easier and less stressful. Plus, you’ll be the envy of all your neighbors.
The Joy of a Clean Garage Floor
Remember when you couldn’t even see your garage floor? Those days are gone! A clean garage floor isn’t just aesthetically pleasing; it’s practical. You can easily sweep or mop it, preventing dirt and grime from building up. Plus, it makes it way easier to find that one tiny bolt you dropped. Think about adding an epoxy coating to your garage floor for extra protection and a sleek look. It’s the perfect finishing touch to your newly organized garage.
A clean garage floor is a safe garage floor. No more tripping hazards, no more struggling to find tools buried under piles of junk. It’s a fresh start for your garage, and it all starts with those awesome floating shelves you just built.
### Wrapping It Up: Your Awesome New Garage!
So, there you have it! Building these floating garage shelves might seem like a big job, but it’s totally doable, even if you’re not a super experienced DIYer. Think about it: no more tripping over stuff, no more digging through piles to find that one tool. Your garage is going to look so much better, and honestly, it feels pretty great to stand back and see something you built with your own hands. Plus, you saved a bunch of money not buying those expensive store-bought units. Now you’ve got a clean, organized space, and maybe even some extra cash for your next project. Go ahead, give yourself a pat on the back – you earned it!
Frequently Asked Questions
What kind of wood should I use for DIY floating garage shelves?
For the main part of your shelves, 2×4 common wall studs are a great choice. For the flat tops of the shelves, plywood boards are better than OSB because they’re stronger. You could also use particle board for the tops if you want a cheaper option.
Is it cheaper to build or buy garage shelves?
Building your own garage shelves can save you a lot of money compared to buying custom-made ones. It’s hard to find long shelves that attach to the walls in the exact sizes you might need. While some garage storage systems can be changed to fit your space, they usually cost a lot.
Are floating shelves strong?
Yes, if you build and attach them the right way, floating shelves can be super strong and hold a lot of weight.
How do I measure for floating shelves?
Just like any project, getting your measurements right from the start is super important. You’ll want to hit at least two wall studs for each shelf to make sure it’s secure.
Are floating shelves hard to put up?
The time it takes depends on how many shelves you’re building and how big they are. If you’re building a few shelves, it might take a couple of hours. The trickiest part can be getting the main frame attached to the wall, making sure it’s level while you screw it in. But once that first screw is in, it gets much easier!
Do I need wall studs to attach floating shelves?
Yes, you really want to attach your floating shelves to wall studs. Studs are the strong wooden beams inside your walls that give them support. Attaching your shelves to these studs makes them very strong and safe. You can find studs using a stud finder.