Are you tired of tripping over your bike in your cramped living space? A swinging bike hanger might just be the perfect solution for you. This innovative storage option allows you to store your bike vertically, saving valuable floor space while keeping your bike safe and accessible. Whether you live in a small apartment or a busy household, a swinging bike hanger can help you maximize your space and keep everything organized. Let’s dive into the benefits, tips for choosing the right one, and how to install it properly.
Key Takeaways
- Swinging bike hangers save space by utilizing vertical storage.
- They provide easy access to your bike while keeping it safe from damage.
- Choosing the right material and weight capacity is essential for durability.
- Installation can be simple with the right tools and a step-by-step guide.
- Swinging bike hangers can enhance your home decor while being functional.
Discover The Benefits Of A Swinging Bike Hanger
Maximizing Vertical Space
Okay, let’s be real, most of us aren’t living in mansions. Space is a premium, especially in apartments or smaller homes. That’s where the beauty of a swinging bike hanger comes in. Instead of your bike taking up valuable floor space, it’s lifted up and out of the way. Think of all the possibilities! You could finally have room for that reading nook you’ve always wanted, or maybe just, you know, be able to walk through your garage without tripping.
Easy Access and Convenience
Let’s face it, if your bike is a pain to get to, you’re less likely to ride it. Swinging bike hangers make it super easy to grab your bike and go. No more wrestling it out from behind a pile of boxes or struggling to lift it down from a high shelf. Just a simple swing and you’re ready to hit the road. Plus, putting it away is just as easy. It’s all about making cycling more accessible and less of a chore.
Protecting Your Bike from Damage
Leaving your bike leaning against a wall or lying on the floor is just asking for trouble. Scratches, dents, and other damage are almost inevitable. A swinging bike hanger keeps your bike safely suspended, away from potential hazards. It’s like giving your bike its own little throne, protecting it from the bumps and bruises of everyday life. Plus, it keeps it looking newer for longer, which is always a win.
Think of a swinging bike hanger as an investment, not just in storage, but in the longevity of your bike. It’s a simple way to keep your ride safe, secure, and ready for your next adventure.
Choosing The Right Swinging Bike Hanger
Alright, so you’re ready to take the plunge and get yourself a swinging bike hanger? Awesome! But before you click that ‘buy’ button, let’s make sure you’re getting the right one for your needs. There are a few things to consider, and trust me, a little bit of research now will save you a headache later. Let’s dive in!
Material Matters
Think about what your hanger is made of. Are we talking sturdy steel, lightweight aluminum, or something else entirely? Steel is generally the strongest and most durable, which is great if you have a heavier bike or just want something that will last forever. Aluminum is lighter, which can be a plus if you’re worried about the weight on your ceiling or wall. Plastic options exist too, but I’d be a little wary of those unless you have a super light bike and trust the brand. Also, consider the finish – powder-coated is usually a good bet for resisting rust and scratches. You might also want to consider wall mounted racks if you are not sure about the material.
Weight Capacity Considerations
This is a big one! You absolutely must know how much your bike weighs. Don’t guess! Find a scale and get an accurate number. Then, make sure the hanger you choose is rated for at least that weight. It’s always better to go a little over than to risk your bike crashing to the ground. Some hangers are designed for lighter bikes (like road bikes), while others can handle heavier mountain bikes or even e-bikes. Pay close attention to the specs!
Design and Aesthetics
Okay, so maybe this isn’t the most important factor, but hey, we all want things to look nice, right? Swinging bike hangers come in a bunch of different designs. Some are super minimalist and barely noticeable, while others are more industrial-looking and can actually add to your decor. Think about the style of your space and choose a hanger that complements it. Also, consider the color – do you want something that blends in or stands out? And finally, think about how the hanger will hold your bike – some use hooks, others use cradles, and some even have straps. Pick the one that you think will be the easiest to use and the safest for your bike. Here are some things to consider:
- The overall look of the hanger
- The color and finish
- How the bike is supported
Choosing the right swinging bike hanger is a balance of practicality and personal preference. Consider the material, weight capacity, and design to find a hanger that not only safely stores your bike but also complements your space. Don’t rush the decision, and you’ll be enjoying your clutter-free space in no time!
Installation Tips For Your Swinging Bike Hanger
Alright, so you’ve got your swinging bike hanger, and you’re ready to reclaim some space. Awesome! But before you start drilling holes in your walls, let’s walk through the installation process. It’s easier than you think, and with a little prep, you’ll have your bike safely stored in no time.
Tools You’ll Need
Before you even think about touching that hanger, gather your tools. Trust me, running back and forth to find a screwdriver is a buzzkill. Here’s a basic list:
- A drill (cordless is super convenient)
- A stud finder (unless you know where your studs are)
- A level (because nobody wants a crooked bike)
- A measuring tape
- A pencil (for marking)
- Screwdrivers or a drill bit set (make sure they match the screws that came with your hanger)
- Safety glasses (seriously, protect your eyes)
Having the right tools makes the job so much smoother. It’s like having a sous chef in your kitchen – everything just flows better.
Step-by-Step Installation Guide
Okay, let’s get down to business. Here’s a simple guide to installing your swinging bike hanger:
- Find a Stud: Use your stud finder to locate a wall stud. This is crucial for supporting the weight of your bike. If you can’t find a stud, you’ll need to use appropriate drywall anchors (but seriously, try to find a stud).
- Mark the Spot: Use your measuring tape and pencil to mark the desired height for your hanger. Make sure it’s high enough so your bike doesn’t hit the ground, but low enough so you can easily lift it.
- Drill Pilot Holes: Drill pilot holes into the stud at your marked locations. This makes it easier to screw in the hanger and prevents the wood from splitting.
- Attach the Hanger: Align the hanger with the pilot holes and screw it securely into the wall. Make sure it’s level!
- Test It Out: Before you fully commit, hang your bike on the hanger and give it a little wiggle. Make sure it feels solid and secure. If it doesn’t, double-check your screws and anchors.
Safety Precautions
Safety first, always! Here are a few things to keep in mind during installation:
- Wear safety glasses to protect your eyes from dust and debris.
- If you’re not comfortable using power tools, ask a friend or family member for help. There’s no shame in admitting you need a hand!
- Make sure the area around you is clear of obstacles and tripping hazards.
- Double-check that the hanger is securely mounted before hanging your bike. A falling bike can cause serious damage (or injury!).
Remember, taking your time and doing it right the first time will save you headaches down the road. A little patience goes a long way!
And that’s it! You’ve successfully installed your swinging bike hanger. Now you can enjoy your newly organized space and admire your handiwork. If you’re setting up multiple bikes, consider the Vibrelli Swivel Bike Wall Mount for optimal use of space.
Creative Ways To Use A Swinging Bike Hanger
In Small Apartments
Okay, so you’re living in a cozy apartment, and space is tighter than your jeans after Thanksgiving dinner. A swinging bike hanger can be a total game-changer. Instead of your bike hogging precious floor space, think about tucking it away neatly against a wall. Consider hanging it behind a door – seriously, that unused space is prime real estate for your two-wheeled friend. I’ve seen people use them in hallways too, especially if the hallway is wide enough. Just make sure it doesn’t become an obstacle course for you and your guests!
In Shared Spaces
Living with roommates or family? Things can get cluttered fast. A swinging bike hanger can help maintain peace and order. Designate a specific area for bike storage – maybe a corner of the garage or a section of the entryway. By using vertical space, you’re not only saving room but also establishing clear boundaries. This can seriously cut down on arguments about whose bike is blocking the way. Plus, it looks way more organized than a pile of bikes leaning against each other.
As Part of Home Decor
Who says bike storage can’t be stylish? Get creative! A swinging bike hanger can actually add to your home decor. Think about painting the wall behind the hanger a bold color to make your bike a focal point. Or, add some cool lighting to highlight your ride. I’ve even seen people incorporate their bike into a gallery wall, surrounding it with art and photos. It’s a fun way to show off your personality and love for cycling. You can even use the swivel design to position your bike as a piece of art when it’s not in use.
I once saw someone who used reclaimed wood as a backdrop for their bike hanger. It looked amazing! It really turned a functional storage solution into a piece of art. It’s all about thinking outside the box and making your bike a part of your home’s story.
Maintaining Your Swinging Bike Hanger
Okay, so you’ve got your swinging bike hanger installed and your bike is happily hanging out of the way. Awesome! But don’t just forget about it. Like anything else, your hanger needs a little TLC to keep it working its best and keep your bike safe. Let’s dive into how to keep things in tip-top shape.
Regular Inspections
Think of this like a quick health check for your hanger. Every month or so, give it a once-over. Check the following:
- Mounting hardware: Are the screws still tight? Give them a little nudge with a screwdriver to be sure. If anything feels loose, tighten it up. You don’t want any surprises!
- Welds and joints: Look for any signs of rust, cracks, or bending. If you spot anything concerning, it’s time to take action. Ignoring it could lead to a bigger problem down the road.
- Swinging mechanism: Does it swing smoothly? Any squeaks or stiffness? A little lubrication might be in order (more on that later).
Cleaning Tips
Dust and grime can build up over time, especially if your hanger is in a garage or shed. A clean hanger is a happy hanger, and it’ll also help prevent any corrosion. Here’s what I do:
- Wipe it down: Use a damp cloth to wipe down the hanger arms and frame. A little mild soap can help with stubborn dirt.
- Lubricate moving parts: For the swinging mechanism, a shot of silicone-based lubricant can work wonders. Avoid oil-based lubricants, as they can attract more dirt.
- Check for rust: If you spot any rust, gently scrub it off with a wire brush and apply a rust-inhibiting primer and paint.
Adjusting for Different Bikes
Got a new bike? Or maybe you’re swapping bikes between family members? You might need to adjust your hanger to accommodate different frame sizes or weights. The Ultrawall BIKEPAL is a great option for easy adjustments.
- Weight capacity: Make sure your hanger is rated for the weight of your heaviest bike. Exceeding the weight limit is a big no-no.
- Frame compatibility: Some hangers have adjustable arms or hooks to fit different frame shapes. If your bike doesn’t quite fit, see if you can make some adjustments.
- Balance: When you hang your bike, make sure it’s balanced. If it’s leaning too far to one side, adjust the hanger or the bike’s position until it’s stable.
Keeping your swinging bike hanger in good condition is a small investment of time that pays off big in terms of safety and convenience. A little maintenance goes a long way in ensuring your bikes are stored securely and your space stays organized. Plus, it gives you a chance to appreciate your awesome storage solution!
Comparing Swinging Bike Hangers To Other Storage Solutions
Wall-Mounted Racks
Wall-mounted racks are a pretty common way to store bikes, and they come in a bunch of styles. Some let you hang your bike horizontally, while others go for the vertical approach. The big plus? They keep your bike off the floor. But, you gotta drill into your wall, which isn’t ideal if you’re renting or just don’t want holes everywhere. Plus, some of those racks can stick out a bit, so they might not be the best if you’re super tight on space. For those looking to save space, consider adjustable wall mounts that keep bikes close to the wall.
Freestanding Stands
Freestanding stands are cool because you don’t need to drill anything. You just plop them down, and you’re good to go. They’re easy to move around, too, which is nice. The downside is they take up floor space, which can be a bummer if you’re trying to maximize every inch. Some of the cheaper ones can also be a bit wobbly, so you might not want to trust them with your super-expensive ride. They’re good for temporary storage or if you move your bike around a lot, but not the best for long-term, space-saving solutions.
Ceiling-Mounted Options
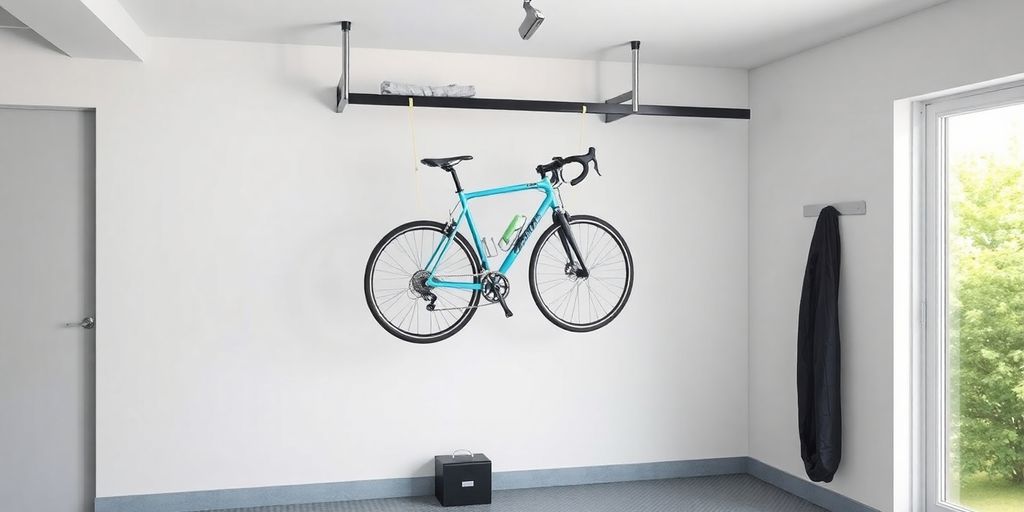
Ceiling-mounted options, like pulley systems, are awesome for getting your bike completely out of the way. If you’ve got high ceilings, especially in a garage, these can be a lifesaver. However, installation can be a pain, and getting your bike up and down can be a bit of a workout. Plus, if you’re not super strong, it might be tough to lift your bike up there regularly.
Think about how often you’ll be using your bike. If it’s a daily thing, a ceiling mount might get old fast. But if it’s more of a weekend warrior situation, it could be perfect. Also, consider the weight of your bike – some of those pulley systems have weight limits.
Real-Life Success Stories With Swinging Bike Hangers
Transforming Small Spaces
Okay, so picture this: Maria in Brooklyn. Tiny apartment, bikes everywhere. It was a disaster zone, honestly. Then she installed a swinging bike hanger. Now, she’s got floor space! Seriously, it’s like she added a whole new room. She says it’s made her apartment feel less cluttered and way more livable. It’s not just about storage; it’s about reclaiming your space. She even managed to create a small reading nook where the bikes used to be. Check out some apartment’s aesthetics that can be achieved with smart storage.
Organizing Family Bikes
Then there’s the Johnson family. Three kids, three bikes, plus mom and dad’s. Their garage was basically a bike graveyard. They were constantly tripping over them, untangling handlebars, and just generally stressed out. They installed a few swinging bike hangers, and boom! Instant organization.
Here’s what they did:
- Each family member got their own designated hanger.
- They staggered the heights to maximize space.
- They even labeled each hanger with names.
Now, the kids can easily grab their bikes without any help, and the garage is actually usable for, you know, parking the car. It’s a total game-changer for family harmony.
Enhancing Home Aesthetics
And let’s not forget about style! Sarah in San Francisco wanted a functional and visually appealing solution. She found a sleek, minimalist swinging bike hanger that actually complements her modern decor. It’s like a piece of art, but it also holds her bike. She says guests are always commenting on how cool and innovative it is. It just goes to show that bike storage doesn’t have to be an eyesore. It can actually add to your home’s overall aesthetic.
Swinging bike hangers aren’t just about storing bikes; they’re about transforming your living space. They’re about creating order, reclaiming space, and even adding a touch of style to your home. It’s a small change that can make a big difference in your daily life.
Wrap-Up: Your Space, Your Bike, Your Way
So there you have it! A swinging bike hanger can really change the game when it comes to saving space. Whether you live in a tiny apartment or just want to clear up some room in the garage, these hangers make it easy to store your bike without taking up too much space. Plus, they look pretty cool too! With a bit of creativity, you can find the perfect spot for your bike that keeps it safe and out of the way. So go ahead, give it a try! You’ll be amazed at how much more room you have for other things.
Frequently Asked Questions
What is a swinging bike hanger?
A swinging bike hanger is a storage device that allows you to hang your bike vertically on the wall, saving space and keeping it organized.
How does a swinging bike hanger save space?
By hanging your bike vertically, a swinging bike hanger uses less floor space. This is especially helpful in small apartments or garages.
Can I easily access my bike with a swinging bike hanger?
Yes! Swinging bike hangers allow you to swing your bike out for easy access, making it convenient to take your bike in and out.
Is it safe to hang my bike with a swinging bike hanger?
Absolutely! Swinging bike hangers are designed to hold your bike securely, preventing any damage while it’s stored.
What do I need to install a swinging bike hanger?
You’ll need basic tools like a drill, screws, and a level to install a swinging bike hanger properly.
Can I use a swinging bike hanger for different types of bikes?
Yes, most swinging bike hangers can accommodate various bike types, including mountain bikes and road bikes.